Error: Firebase Storage Is Required to Upload Files
Firebase is a mobile and web application development platform created by Google that provides products and solutions that you tin rely on for you lot app evolution needs, including Cloud Firestore, Cloud Functions, Authentication, Hosting, Realtime Database, Cloud Storage, and more.
Deject storage service is designed for developers to easily shop and serve user-generated content like photos and videos, which are stored in Google Cloud Storage buckets. In addition, Firebase Cloud Storage integrates with other Firebase services like Firebase Authentication so that users can organize uploaded files and apply admission controls if needed.
In this article, we'll learn how to upload a file to Firebase Cloud Storage and access the URL of the uploaded file using Firebase v9.10,the latest version at the fourth dimension of writing. To follow along with this article, you lot'll need:
- npm and Node.js installed
- Cognition of React and React Hooks
- A Google account to admission Firebase Console
Let's get started!
Table of contents
- Create a project on Firebase
- Create a new React app
- Create a Deject Storage saucepan
- Programmatically upload and read files
- Determination
Create a project on Firebase
Go to Firebase Console at https://console.firebase.google.com/. You'll see the homepage:
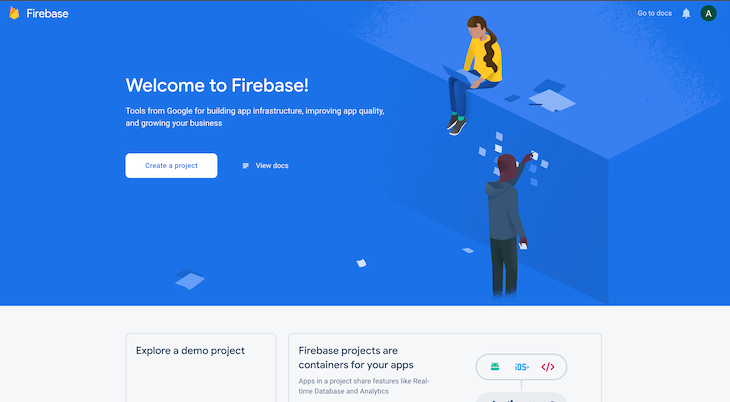
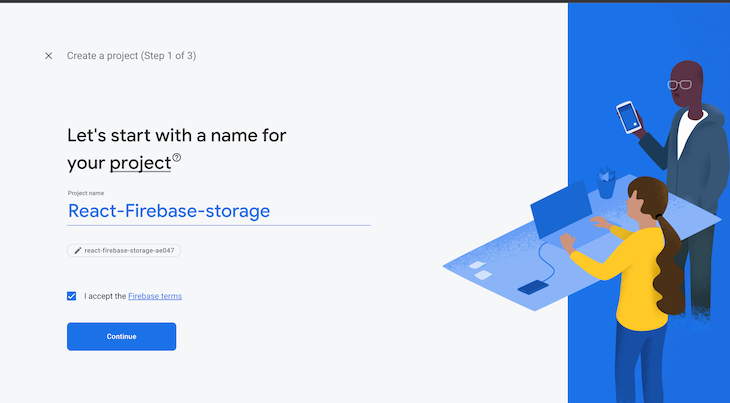
Click on the Create a Projection button. Type in the name of your project. I'll proper name mine React-Firebase-storage. Accept the Firebase terms and click Continue:
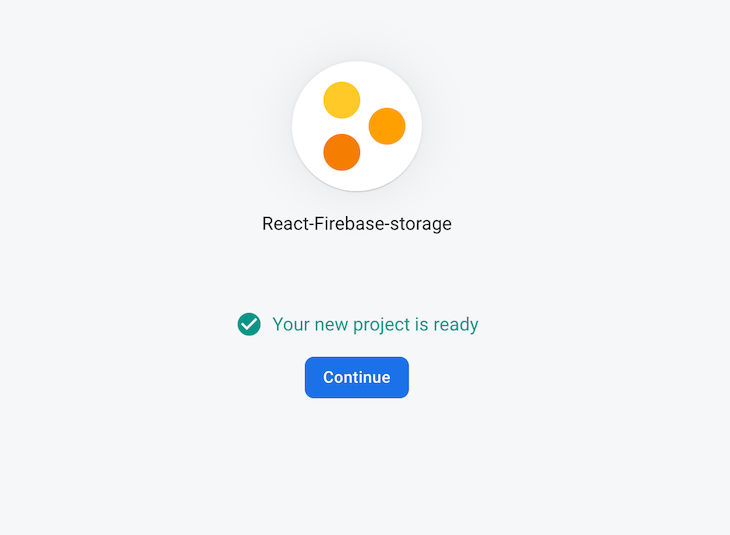
If you'd similar to use Google Analytics in your project, then get out the Enable Google Analytics toggle on. I don't need it for this demo, so I'chiliad going to turn it off. Click on Create project and wait for the project to be created:

Click on Continue to go along to the console:
In the next interface, we'll select the platform we want to utilize to build the application we just created. In this instance, it's going to be on web, so we choose spider web:
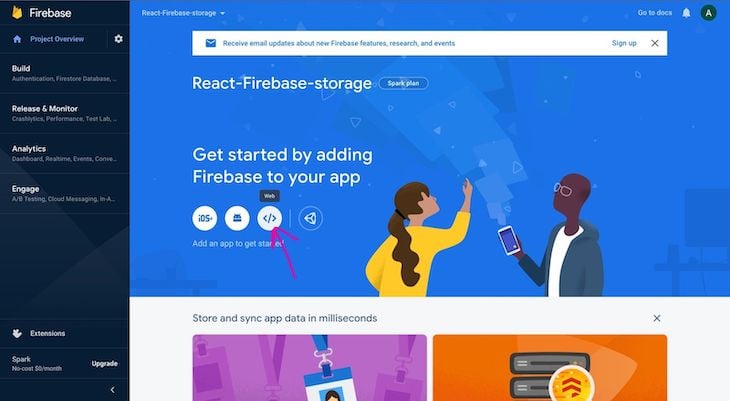
Side by side, nosotros enter a proper noun to register the app. Since I'one thousand non going to host the app on Firebase, I'll skip that and click on Register app:
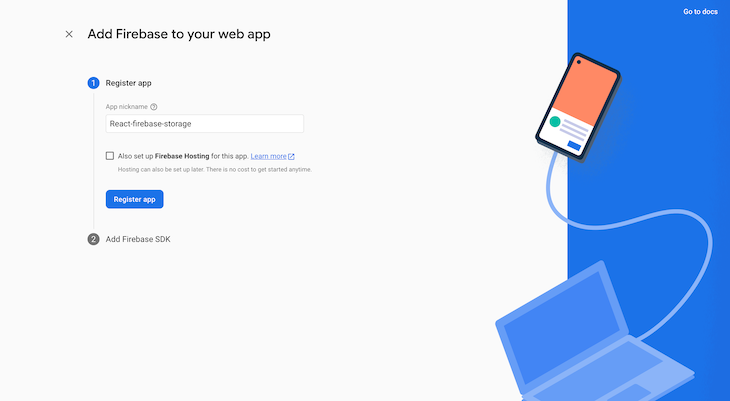
Next, we'll initialize a new React app and add Firebase to the project with the credentials provided:
Create a new React app
Create a new React app with the command below:
npx create-react-app app-name
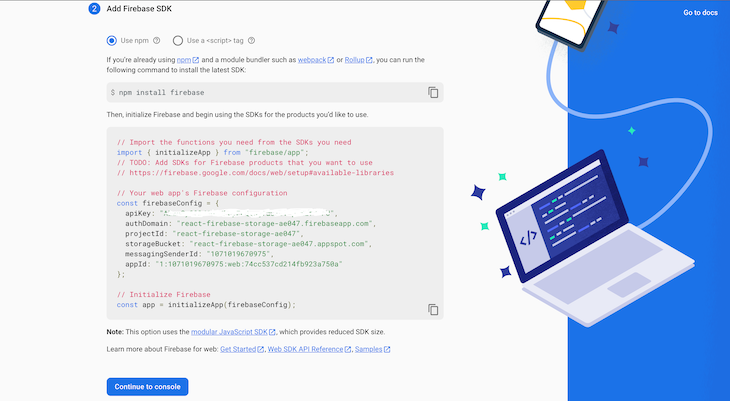
Next, install Firebase as follows:
npm install firebase
Create a new file in the src folder called firebase.js. Copy the configuration lawmaking from when nosotros created a Firebase projection and paste it in the firebase.js file.
Initialize the Firebase app using the config object containing the credentials and export it. You'll too export a reference to the storage service, which is used to create references in your storage:
// Import the functions you demand from the SDKs you need import { initializeApp } from "firebase/app"; import { getStorage } from "firebase/storage"; // TODO: Add SDKs for Firebase products that you desire to utilise // https://firebase.google.com/docs/web/setup#available-libraries // Your web app's Firebase configuration const firebaseConfig = { apiKey: "************************************", authDomain: "react-firebase-storage-ae047.firebaseapp.com", projectId: "react-firebase-storage-ae047", storageBucket: "react-firebase-storage-ae047.appspot.com", messagingSenderId: "1071019670975", appId: "one:1071019670975:spider web:74cc537cd214fb923a750a" }; // Initialize Firebase export const app = initializeApp(firebaseConfig); export const storage = getStorage(app); In App.js, allow's create a form for uploading files and a button for submitting:
import './App.css'; function App() { return ( <div className="App"> <form className='form'> <input blazon='file' /> <button type='submit'>Upload</button> </grade> </div> ); } consign default App; 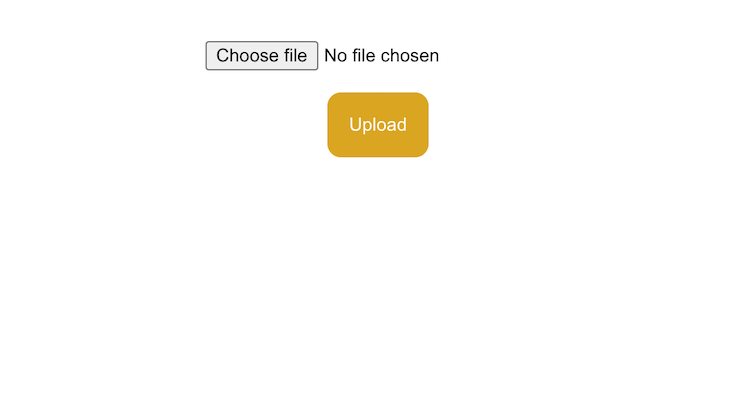
Create a Cloud Storage bucket
To employ whatever of the Firebase services in your app, you take to prepare them upwards for that item projection in Firebase Console. Therefore, Firebase knows that this app is using said product.
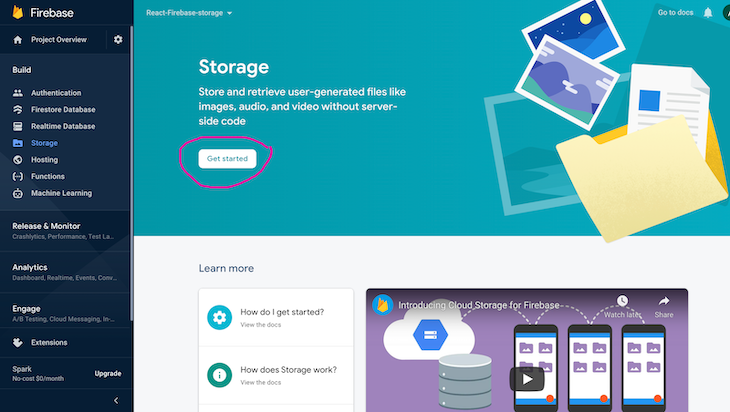
Afterwards copying the config code in Firebase console, click on Go to console. We'll be shown an interface listing all the products we could utilize. On the left menu bar, click Storage:
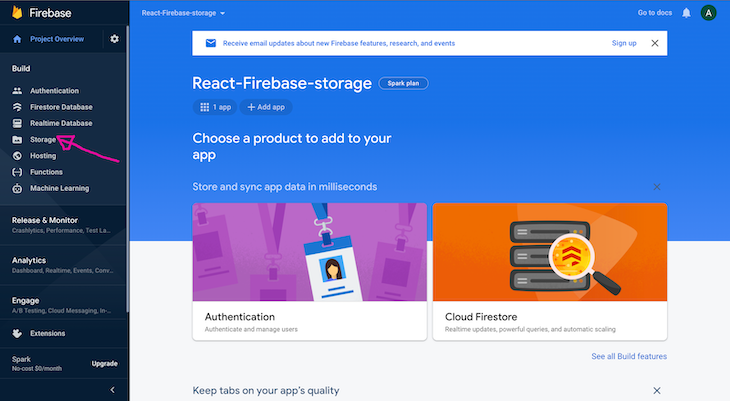
Click on Get Started:
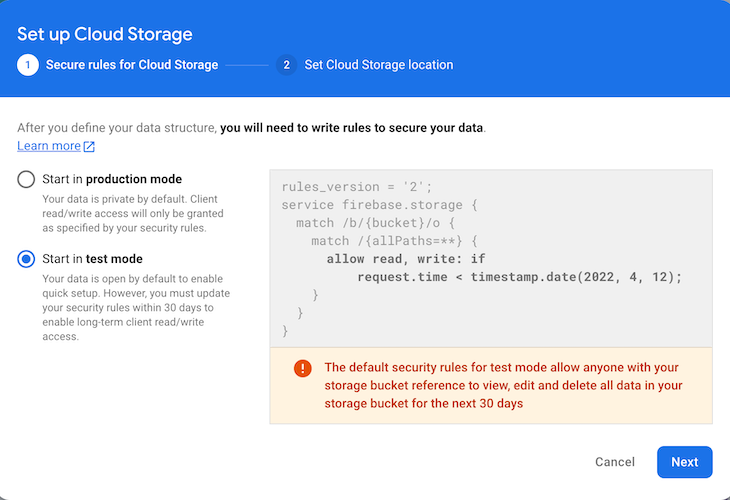
For the purpose of this demo, nosotros'll cull test manner. But for production applications, you should cull production mode to limit who can read and write to the storage. Click Next:
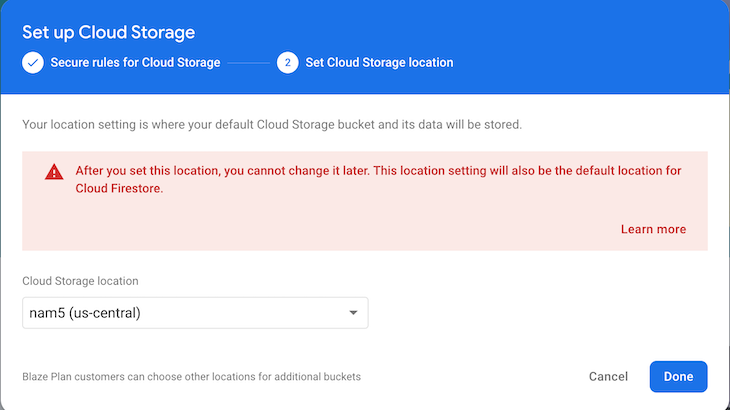
Select Cloud Storage location and click Done:
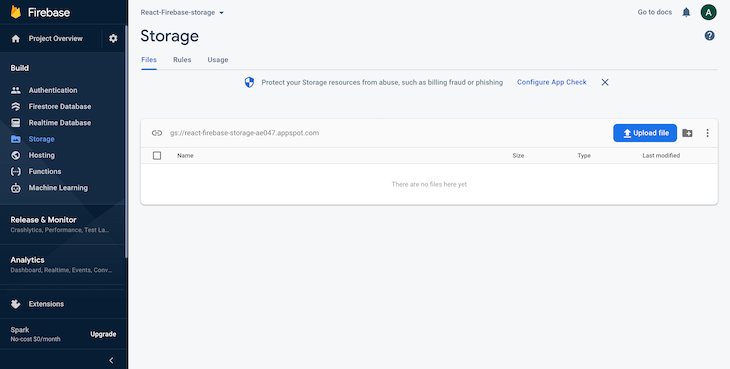
At present, we can programmatically upload files to the Cloud Storage bucket and also read those files:
Programmatically upload and read files
With that, everything is set upwards for the states to write the code for uploading files. In App.js, nosotros'll start past importing the storage nosotros exported from the Firebase config file, the methods nosotros'll use from firebase/storage, and the React useState Hook:
import { useState } from "react"; import { storage } from './firebase'; import { ref, getDownloadURL, uploadBytesResumable } from "firebase/storage"; Let's write a function that will run when a user hits the submit push:
const [imgUrl, setImgUrl] = useState(zippo); const [progresspercent, setProgresspercent] = useState(0); const handleSubmit = (e) => { e.preventDefault() const file = eastward.target[0]?.files[0] if (!file) return; const storageRef = ref(storage, `files/${file.name}`); const uploadTask = uploadBytesResumable(storageRef, file); uploadTask.on("state_changed", (snapshot) => { const progress = Math.round((snapshot.bytesTransferred / snapshot.totalBytes) * 100); setProgresspercent(progress); }, (error) => { alert(mistake); }, () => { getDownloadURL(uploadTask.snapshot.ref).so((downloadURL) => { setImgUrl(downloadURL) }); } ); } Allow's break down what is occurring in the handleSubmit role. We initialized two states for the image URL after nosotros read the uploaded file and the progress value as the prototype is being uploaded.
const file = due east.target[0]?.files[0] created a variable and saved the supplied file to it.
Next, we created a reference to the file nosotros want to operate on by calling the ref() on the case of the storage service we already created in the config file. As the second parameter, we passed in a path we desire the ref to bespeak to, which is optional.
In one case the reference has been created, we can upload a file by calling the uploadBytesResumable(). It takes the reference we created before and then the file to exist uploaded to cloud storage. Note that uploadBytes() does exactly the same thing, and then either one tin be used.
Withal, with uploadBytesResumable(), the upload can be paused and resumed, and it exposes progress updates. Nosotros use it here because we want to brandish the progress of the upload as it'southward ongoing. If you don't want that functionality, feel free to employuploadBytes().
Next, nosotros telephone call the on() method on the hope returned from calling uploadBytesResumable() to listen for state changes, errors, and successful uploads. These iii callback functions are run at unlike stages of the file upload. The commencement runs during the upload to detect state change events similar progress, pause, and resume, while the side by side i is triggered when in that location is an unsuccessful upload. Finally, the last is run when the upload completes successfully.
On successful upload, we call the getDownloadURL() to become the download URL of the file to display on the app. Nosotros and so update state with the new image URL downloaded.
The total code for displaying the image and progress bar is shown below:
import './App.css'; import { useState } from "react"; import { storage } from './firebase'; import { ref, getDownloadURL, uploadBytesResumable } from "firebase/storage"; role App() { const [imgUrl, setImgUrl] = useState(zip); const [progresspercent, setProgresspercent] = useState(0); const handleSubmit = (e) => { e.preventDefault() const file = e.target[0]?.files[0] if (!file) return; const storageRef = ref(storage, `files/${file.name}`); const uploadTask = uploadBytesResumable(storageRef, file); uploadTask.on("state_changed", (snapshot) => { const progress = Math.round((snapshot.bytesTransferred / snapshot.totalBytes) * 100); setProgresspercent(progress); }, (error) => { alarm(error); }, () => { getDownloadURL(uploadTask.snapshot.ref).then((downloadURL) => { setImgUrl(downloadURL) }); } ); } render ( <div className="App"> <form onSubmit={handleSubmit} className='form'> <input blazon='file' /> <button type='submit'>Upload</button> </class> { !imgUrl && <div className='outerbar'> <div className='innerbar' style={{ width: `${progresspercent}%` }}>{progresspercent}%</div> </div> } { imgUrl && <img src={imgUrl} alt='uploaded file' pinnacle={200} /> } </div> ); } export default App; Conclusion
Firebase Cloud storage is very easy to use for storing different media types. In addition, information technology automatically scales, and then you lot don't have to worry almost moving to another provider when your data gets besides big.
Thank you for reading. I hope you lot found this tutorial helpful in some way. Feel free to ask any questions in the comments beneath. Happy coding!
LogRocket: Total visibility into your web apps

LogRocket is a frontend application monitoring solution that lets you replay problems as if they happened in your own browser. Instead of guessing why errors happen, or request users for screenshots and log dumps, LogRocket lets y'all replay the session to quickly understand what went wrong. It works perfectly with any app, regardless of framework, and has plugins to log additional context from Redux, Vuex, and @ngrx/store.
In addition to logging Redux actions and state, LogRocket records console logs, JavaScript errors, stacktraces, network requests/responses with headers + bodies, browser metadata, and custom logs. It also instruments the DOM to record the HTML and CSS on the page, recreating pixel-perfect videos of even the well-nigh complex single-page apps.
Try it for free.
Source: https://blog.logrocket.com/firebase-cloud-storage-firebase-v9-react/
Post a Comment for "Error: Firebase Storage Is Required to Upload Files"